A Vegan Idiot Abroad – The VeganAsana in China

IMG_1971I recently had the opportunity to travel to China for my day job. Before the trip, I wasn’t sure what the situation would be like for me, in terms of diet. Now, with the amazing ability of hindsight, I realize the things I could have done ahead of time to help myself (that I didn’t do). So, I am sharing that knowledge with you!

My trip took me to Beijing, Nanyang, Zhoukou, and Zhengzhou, so other than Beijing, I was in Henan Province. Food practices in China, as in every country, vary by locale, so some of my experiences will be different, but the general principles should hold. Similarly, I traveled for work, so my hosts were selecting restaurants and dishes, for the most part, except during breakfast meals, where there was often some sort of buffet option.

Things I did right, and would do again:

1. Take snacks. There were a few meals that I/we skipped due to jet lag or being too full at the normal meal time from the prior meal. A vegan granola bar was a good thing to have around.

2. Take drink mix powders. If you like to drink something besides bottled water, tea, or alcohol (like lemonade or similar), you might want to take some drink mix powders with you. Bottled water was plentiful in hotels, but I hate drinking water first thing in the morning, so I brought some fruit drink powders with me, and it made taking pills etc. in the morning easier.

3. Be as flexible as you can be, within your own moral compass and body capability. While I won’t eat egg at home and try to avoid shared cooking oil etc., my lack of language skills and the fact that I was being hosted made this not really possible. I knew that going in, so I resolved to do the very best I could and let the rest go.

4. Bring appropriate stomach remedies. Whatever you sometimes need at home, bring it with you.

5. Read about food practices of China, so that you aren’t caught off guard by having food put on your plate by your neighbor (with his chopsticks), seeing a chicken head gazing at you from a dish, the lack of coffee, etc.

Things I wish I had done, or did, but not enough of:

1. Learn some characters for food items and pronunciation of food items in Chinese. Sometimes, even with an interpreter, I was confused about what I might be eating, and I didn’t have the capacity to understand or express the most simple food concepts.

2. Take coffee packets if you have a coffee addiction. In Beijing, this was not a problem for me, but when we left Beijing, the caffeine headache was not helping my ability to be a good traveler.

3. Read more about the food practices of the areas you are visiting. I had read general things about food and eating in China. I had not read enough to understand things like how much Biaju consumption would accompany business lunches or dinners. I had not read enough to understand that the province I was visiting would rarely include rice served in a meal. I had read enough to know that there would not be many dishes that were totally vegetables (even the vegetable dishes tended to have a little meat), but not enough to know how challenging it would be even for my excellent interpreter to explain my eating style.


All in all, it was an interesting and productive trip. I think I managed to avoid offending anyone with my food habits. I didn’t starve or make myself sick. I ate some interesting and some delicious items. And, I did my best. Next time, I’ll know more and do better.
Vegan Corned No-Beef

IMG_0851

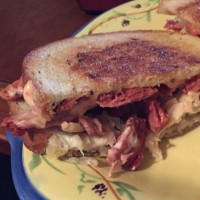
Corned beef was not something I anticipated missing as a vegan. I was never a huge fan of corned beef and cabbage (too much fat – gross) or corned beef sandwiches. But, BUT, I forgot about Reubens. I loved Reubens. I’m not sure it was ever really about the corned beef, but the combination of salty chewy with creamy savory and the bit of sauerkraut plus toasted bread … yes, please.

So, I didn’t go looking for a way to replicate corned beef until I had a Radical Reuben at the Chicago Diner (if you are in Chicago, GO, GO NOW!). And then I realized that I had to make this happen more often. I started making my own versions without any meat substitute. They were pretty good. I made it with smoky seitan instead, and that was pretty good. And, if I ate out at a vegan restaurant, I looked for a Reuben and ordered one if I found it.

Then recently, soy curls happened to me (cue celestial music). These little suckers are almost magic. If you miss the chewy density of a meat based item, they work wonders. And, like many soy based items, they don’t have much flavor on their own but are willing to take on flavors around them.

Saturday night, my daughter requested pickled beets for Sunday dinner. It turns out she hates pickled beets, but that’s another story. I was boiling the beets and looking at the water and vaguely remembered seeing a suggestion somewhere to use beet juice to color seitan. So… after I finished the boiling, I kept the pickling spices handy and drained off the bright red water, and this happened.


Ingredients

1 package soy curls*
4 cups “beet water” (from boiling beets) or puree a can of beets and thin with water
1 cup apple cider or white vinegar
1 T pickling spice or 5 whole cloves + 1 cinnamon stick + ½ tsp dill + 1 clove minced garlic + ½ tsp peppercorn + ⅓ tsp mustard seed
½ tsp sea salt
2 T olive oil

Process 

Heat beet water, vinegar, pickling spices, and salt to a boil. Remove from heat. Add soy curls, cover, and allow to soak for an hour (more is fine).

When ready to cook, drain remaining liquid well. Soy curls will now be nice and bright. Put olive oil in the bottom of a large pan and sauté until curls begin to slightly brown.

IMG_0855 Serve with vegetables, refrigerate for a sandwich, or…. make a Reuben!

To Reubenize

Just heat some sauerkraut (I like to sauté it). Add some vegan cheese and allow to melt. Vegan butter your rye bread and toast to golden. Assembled sandwich with corned no-beef, sauerkraut with vegan cheese, and your favorite Reuben dressing. I make mine with a combination of vegan mayo, ketchup, and sweet relish.

Dig in!

(pardon the non-excellent food photography – I was too excited about eating)

*This is an Amazon affiliate link. To buy without the link, just search Butler Soy Curls on Amazon. 

Vegan Baklava, Oh Yeah!

IMG_0750I started with a recipe from  CrandleCakes and made slight adjustments, but not much!

IngredientsIMG_0742
1 T cinnamon
6 oz each- pistachios, walnuts, pecans
⅔ cup raw sugar
1 pound (1 package) thawed phyllo dough
4 oz. coconut oil (if you don’t  like coconut oil, use all margarine)
4 oz. vegan margarine (I used Earth Balance)
2 cups agave
1 cup water
¼ cup orange juice
1 t lemon juice

Process

If your phyllo is frozen (it probably is), thaw overnight in the refrigerator and then set it out for an hour or so before you use it. Don’t thaw on the counter!

Open the dough and unroll. Trim it to fit in your pan size. It will be around a 13×9, but I found myself trimming about ½ inch length and width. DD used the extra to make a separate mini baklava.

In a food processor or mixer, chop together cinnamon, nuts, and sugar until the pieces are the size you want them. This took about 15 seconds in the Vitamix, but will depend on your appliance. A little more fine will make a more dense pastry.

Put margarine and coconut oil in a microwave safe bowl and heat until just melted.

Use a pastry brush or new painting brush to apply a layer of the melted margarine. Lay down a sheet of phyllo. Repeat 9 times (total of 10 layers). Curse and wonder why you started this.

Sprinkle around ⅓ of the nut mixture over the dough.

Add six more layers of phyllo and margarine, then ⅓ of the nuts, then six more, then ⅓ of the nuts.

Finally, do 10 more layers of the phyllo and margarine. You’ll probably be sweaty and oily by now.

Bake for 30 minutes at 350*. Leave the oven on.

Remove from oven and slice into squares or diamonds or whatever. I meant to do diamonds until I realized it was hard to slice and decided squares were great!

Bake for 30 minutes at 350*. Yep again.

While it’s baking, combine agave, water, orange juice, and lemon juice in a saucepan and bring to a simmer. Simmer for about 10 minutes. Turn off to cool.

Remove baklava and allow both that and the syrup to cool for 30 minutes or so. Recut if needed. Drizzle with about ¾ of the syrup (I actually just put it all on, but if you want to save some for serving).

Cover and refrigerate 6-8 hours before serving.

Optional: Drizzle slices with more syrup right before you serve.